- •
- Car / Truck •
- Car / truck - equipment and accessories to repair tubeless •
- REPAIR 8905/3 SAFETY SEAL ORIGINAL - 156 STRINGS
REPAIR 8905/3 SAFETY SEAL ORIGINAL - 156 STRINGS
Tubeless repair strings car wheels
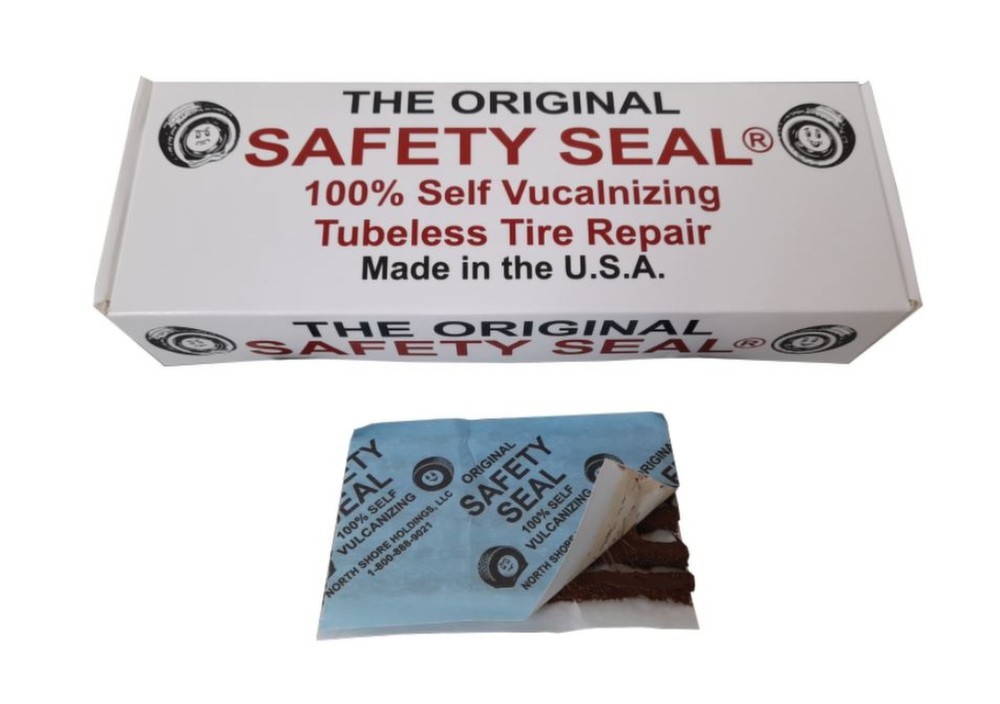
156 tubeless repair string box.
Lenght 10 cm
Watch video
-
ATTENTION:
♦ Before using this product carefully read the instructions. This is necessary to prevent
possible injuries to the operator and damage to the product and/or tyre under repair.
♦ Always use the appropriate eye protectors when repairing a tire.
♦ DO NOT USE this product if the tyre is visibly worn, deformed and/or damaged.
♦ DO NOT TRY to repair any type of tyre if some of these conditions occur:
- the tread has a depth of less than 1,6 mm.
- the hole is greater than 6,35 mm.
- where there is structural damage.
- side puncture (repair can only be done on the tread).
- the tyre was inflated with flammable gas.
- it is not possible to locate the object that caused the puncture.
- the piercing object is not in a straight position, indicating that the trajectory of the hole is not straight.
- there is little resistance when the repair is inserted (see step 3).
- it is obvious that the tyre was used deflated.
- there is the possibility of internal damage or damage to the structure of the tyre.
♦ The tools supplied with this kit are intended for use only with Safety Seal products and not
shall not be modified or used for any other purpose.
♦ North Shore Holdings, LLC cannot be held liable if the user alters and/or damages
products or do not use the products in line with these instructions.STEP 1 IDENTIFICATION
Locate and identify the puncture and remove the piercing object, paying particular attention to the entry trajectory of the external body into the tyre (image 1). If the puncture is greater than 6,35 mm, there are signs of excessive damage to the tyre carcass or the path of the hole is not straight, the tyre must be disassembled for internal inspection. If you have any doubts about the path of the hole, insert the tool with the needle lubricated with the LUBE into the hole (image 2). The needle tool will follow the path of the hole without creating a new one.
STEP 2 PREPARATION
Apply lube lubricant to the reamer and insert it carefully into the hole, making sure to follow the path of the hole. Once the reamer has been inserted up to half its length, turn it clockwise (image 3). The rotation allows you to post the steel fibers without causing further damage and facilitates the insertion of the Safety Seal repair. This prevents further damage to the tyre structure and allows easy repair. Leave the reamer inserted in the drill while you prepare for the next step.STEP 3 REPAIR
Remove the cord from the blue protective paper by pulling down and away from the paper (image 4). Note: If the puncture you are repairing is 3.17mm or less, use a "slim" cord for repair.Run the repair through the needle’s eye so that the same length will come out from both sides (image 5). Use ONLY ONE puncture repair. Place a small amount of lube on the tip of the needle (image 6). With the reamer still inserted into the puncture, inflate the tire about 10 psi / 0.68 bar so that you have a durable tire enough to fit the repair into the puncture.Remove the reamer and firmly press the needle tool, equipped with the cord, in the hole until the protection touches the tyre (image 7 and 8). If the pressure is not suitable for repair, repeat the previous step.Hold the protection firmly and press it against the repair zone (image 9). To remove the tool with a needle, pull it out straight and keep pressing the guard. DO NOT rotate the tool with a needle while removing it. The protection causes the repair to be removed from the needle.
STEP 4 FINISHING WORK
Cut the surplus repair material using the blade inside the kit (image 10). Inflate the tire again according to the specifications of the manufacturer of the tire. Check for other leaks with Saftey seal seek-a-leak (image 11). In case there are other air passages around the repair, this indicates that there may be internal damage to the tire or that the puncture is too wide. In this case the tyre must be disassembled and inspected internally.-
"The ultimate Tubeless repair"
What makes this product so special and unique?
Test
On the road, in the laboratory and on the track, the tests carried out prove that the Safety Seal is a perfect sealant.
Quality
Safety Seal is a product created in scientific laboratory, the result of years of research and road testing. The various productions are subject to laboratory tests to ensure quality and reliability.
Vulcanizing
The first repair material made of 100% self-vulcanizing rubber fiber. Does not require the use of mastic or cement.
Non breathability
The Safety Seal repair is a permanent repair as the sealant is vulcanized and does not come off with heat or pressure. Given its vulcanizing property.
Composition of the product
The cord is made with the ingredients of the tire itself, rubber and fiber. The Safety Seal product consists of multiple filaments of high-quality synthetic fibers completely soaked in a solution of vulcanized rubber. Each individual filament is covered with rubber and then braided to become a durable and durable repair material.
Simplicity
Easy to use. Repairs in minutes and with minimal effort.
Versatility
A universal repair for all types of drilling. Thanks to its ductility Safety Seal adapts to the shape of the drilling.
Expediency
Safety Seal is the best permanent repair on the market, which guarantees the use of the tire until wear.
Duration
Oxidation tests show that the life of the Safety Seal cord is over six years.
REPAIR 8905/3 SAFETY SEAL ORIGINAL - 156 STRINGS
Code: MRI01CVYA0003
Quantity:Availability: not available